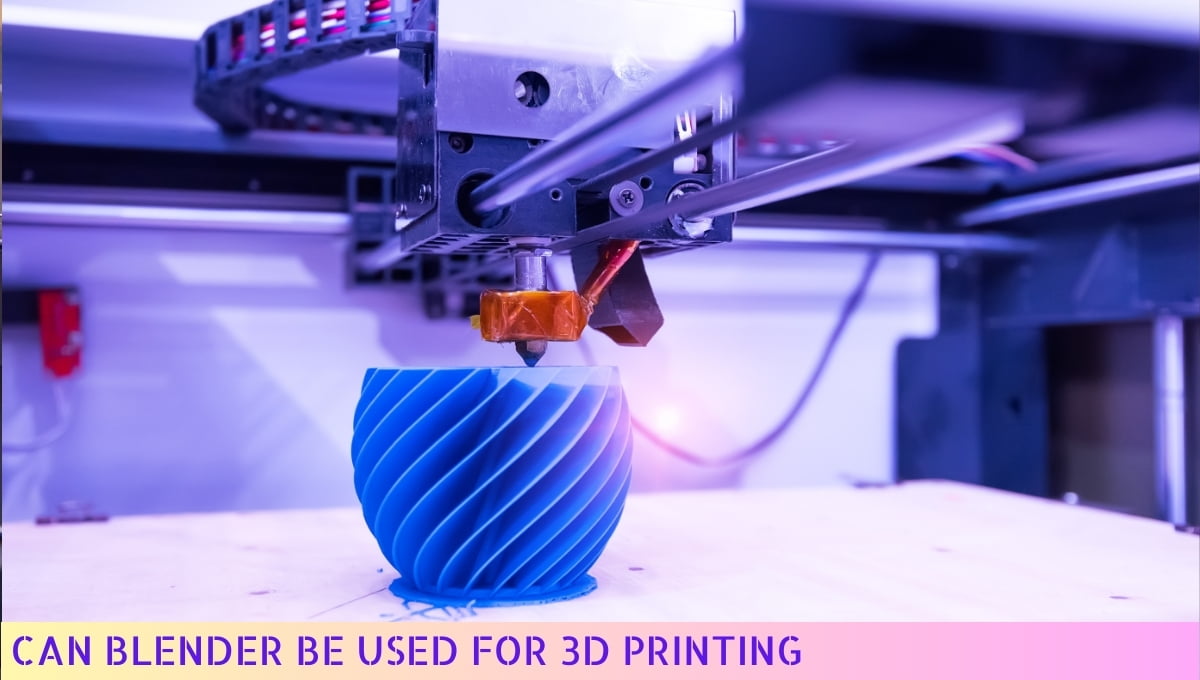
Yes, Blender can be used for 3D printing.
Blender is a versatile 3D modeling software that allows users to create intricate designs and export them in various file formats compatible with 3D printers.
With its extensive toolset and features, Blender provides the necessary tools for designing, optimizing, and preparing models for 3D printing.
Whether it’s creating prototypes, figurines, or functional objects, Blender offers a robust solution for 3D printing enthusiasts and professionals alike.
I. Understanding Blender’s Compatibility with 3D Printing
So, you’re all fired up about 3D printing and want to explore the world of Blender. Well, my friend, you’ve come to the right place!
In this article, I’m going to give you the lowdown on how Blender plays nice with 3D printing. Strap yourself in, because we’re about to take a wild ride!
Now, you might be wondering, “What’s the big deal? Can’t I just use any ol’ 3D modeling software for 3D printing?” Ah, my curious comrade, not all software is created equal.
Blender, with its powerful features and user-friendly interface, has become a go-to choice for many 3D printing enthusiasts.
So, what makes Blender such a perfect match for 3D printing? Well, let me break it down for you. Blender has a wide range of tools and functionalities that allow you to create intricate and detailed 3D models.
From sculpting to texturing, from rigging to animation, Blender has got you covered.
But here’s the real kicker: Blender supports a variety of file formats that are compatible with 3D printers.
Whether you’re rocking an FDM printer or a fancy SLA machine, Blender can export your models in formats like STL, OBJ, and PLY. Talk about flexibility!
Now, you might be thinking, “But how do I ensure that my Blender models are ready for 3D printing?”
Well, my friend, worry not. In the next section, I’ll guide you through the process step by step, so you can unleash your creativity and bring your designs to life.
But before we dive into the nitty-gritty, let me drop a few pearls of wisdom. When it comes to 3D printing, attention to detail is key.
Make sure to check your model for any potential issues like non-manifold geometry, intersecting faces, or flipped normals. Trust me, these little gremlins can wreak havoc on your print!
Alright, my fellow 3D printing enthusiasts, get ready to embark on a journey of creativity and innovation.
In the next section, we’ll delve into the wonderful world of preparing Blender models for 3D printing. So, grab your favorite beverage, put on some groovy tunes, and let’s get this party started!
II. Understanding the Process of Preparing Blender Models for 3D Printing

Creating stunning 3D models with Blender is just the first step. To bring your creations to life through 3D printing, you need to ensure that your models are properly prepared.
In this step-by-step guide, I’ll walk you through the process of preparing your Blender models for 3D printing, so you can achieve outstanding results.
Step 1: Check and Correct the Scale
The first thing you need to do is to check the scale of your model. 3D printers work with specific dimensions, so it’s crucial to ensure that your model is scaled correctly.
Use the measurement tools in Blender to verify the dimensions of your model and make any necessary adjustments to ensure it matches the desired size for printing.
Step 2: Simplify the Geometry
Complex geometries can cause issues during the 3D printing process. To avoid any problems, simplify the geometry of your model by reducing unnecessary details and optimizing the mesh.
This will not only improve the printing process but also reduce the chances of errors and improve the overall print quality.
Step 3: Check for Non-Manifold Geometry
Non-manifold geometry, such as intersecting faces or edges, can cause printing errors and result in a flawed print. It’s essential to check your model for any non-manifold geometry and fix it before proceeding.
Blender provides tools to help you identify and repair non-manifold issues, ensuring a smoother printing process.
Step 4: Ensure Water tightness
For a successful 3D print, your model must be watertight, meaning there are no gaps or holes in the mesh. Inspect your model carefully and fill any gaps or holes to ensure a solid, printable object.
Blender’s Boolean operations and the Fill tool can help you achieve watertightness and ensure a seamless print.
Step 5: Orient the Model for Printing
Properly orienting your model is crucial for a successful 3D print. Consider the shape and structure of your model and find the optimal orientation that minimizes the need for support structures while ensuring stability during printing.
Experiment with different orientations to find the one that works best for your specific model.
Step 6: Generate Support if Needed
In some cases, your model may require support structures to prevent overhangs and ensure stability during printing. Blender provides tools to generate supports automatically, or you can manually add them to your model if necessary.
Take the time to analyze your model and add support where needed to achieve the best possible print.
Step 7: Export the Model in the Appropriate Format
Once you’ve prepared your model for 3D printing, it’s time to export it in the correct file format. Most 3D printers accept STL (Standard Tessellation Language) files, so ensure that you export your model in this format.
Blender offers built-in export options for STL files, making it easy to save your model for printing.
By following these step-by-step instructions, you’ll be well on your way to preparing your Blender models for 3D printing success.
Remember to double-check your settings and consult your 3D printer’s guidelines for any specific requirements. Happy printing!
III. Tips and Considerations for Successful 3D Printing Using Blender
Alright, folks, now that we’ve covered the nitty-gritty of preparing Blender models for 3D printing, it’s time to dive into some handy tips and considerations to ensure your printing journey goes as smooth as butter.
So, grab your cup of joe, and let’s get started!
1. Check Your Model’s Integrity
Before hitting that print button, it’s crucial to double-check the integrity of your model.
Make sure there are no missing faces, inverted normals, or intersecting geometry. Trust me, you don’t want any surprises halfway through the printing process!
2. Optimize for Printing
Printing a high-poly model can be a recipe for disaster, my friend. So, simplify your model by reducing unnecessary geometry and optimizing it for 3D printing.
Your printer will thank you for it, and you’ll save on both time and filament!
3. Consider Support Structures
Support structures are like the scaffolding for your 3D print, holding up those overhangs and intricate details.
Depending on your model, you might need to add some supports to ensure a successful print. Just remember to remove them once the print is complete, like peeling off a band-aid!
4. Mind the Overhangs
Speaking of overhangs, they can be a bit tricky to print without proper support. So, when designing your model, try to minimize steep overhangs or include gradual angles that your printer can handle.
It’s all about finding that sweet spot between design aesthetics and printability!
5. Consider Print Bed Adhesion
Print bed adhesion is the glue that holds your print in place, preventing it from warping or detaching mid-print.
To ensure a strong bond, make sure your print bed is clean and level, and consider using adhesion aids like a brim or a raft. It’s all about keeping things grounded!
6. Experiment with Print Settings
Every printer is unique, just like your fingerprint. So, don’t be afraid to experiment with different print settings like layer height, infill density, or print speed to achieve the best results.
It’s like adding your secret sauce to the recipe, creating a print that’s uniquely yours!
7. Post-Processing Magic
Once your print is complete, it’s time to unleash your post-processing wizardry! Sanding, painting, or adding finishing touches can take your print to the next level. Get creative and let your imagination run wild!
8. Learn from Failures
Failure is just another stepping stone on the path to success. Embrace those failed prints, analyze what went wrong, and learn from your mistakes. Remember, even the greatest artists had their fair share of failed masterpieces!
So there you have it, folks! These tips and considerations will help you navigate the exciting world of 3D printing using Blender. Now go forth, create amazing prints, and let your imagination soar!
IV. Understanding the Compatibility of Blender with 3D Printing
Blender, a powerful 3D modeling software, isn’t just for creating jaw-dropping visuals and mind-boggling animations. It’s also a fantastic tool for 3D printing enthusiasts and professionals alike.
With its versatility and robust features, Blender can help you bring your digital designs to life in the physical world.
When it comes to compatibility, Blender plays nicely with 3D printing. It supports various file formats commonly used in the 3D printing industry, such as STL (Standard Tessellation Language) and OBJ (Object).
These formats are like a universal language that 3D printers understand, making it a breeze to translate your Blender creations into tangible objects.
To ensure a smooth transition from Blender to your 3D printer, there are a few important considerations to keep in mind.
Let me walk you through the steps to prepare your Blender models for 3D printing, so you can avoid any hiccups along the way.
1. Simplify Complex Geometry:
When it comes to 3D printing, simplicity is key. Complex geometries can cause printing issues and may not turn out as expected. To avoid this, it’s crucial to simplify your model’s geometry.
Blender provides various tools and modifiers to help you reduce complexity, such as the Decimate modifier or the Remesh tool. These handy features allow you to streamline your design without compromising its essence.
2. Check and Fix Non-Manifold Geometry:
Non-manifold geometry refers to parts of your model that aren’t correctly connected or have overlapping surfaces. These issues can lead to printing errors or even complete failures.
Blender has built-in tools like the 3D Print Toolbox that can help you identify and fix non-manifold geometry. Running these checks before sending your model to the printer will save you time and frustration down the line.
3. Scale and Size Matters:
Before hitting that print button, make sure to check the scale and size of your model. Blender uses a unit system, and it’s important to ensure that your design is properly scaled for 3D printing.
You don’t want your miniature masterpiece turning out as a giant monstrosity or vice versa. Take advantage of Blender’s measurement tools to confirm that your model’s dimensions match your intended output.
4. Consider Wall Thickness:
When designing for 3D printing, it’s essential to consider wall thickness. Thin walls may result in fragile or unprintable models, while excessively thick walls can lead to unnecessary material usage and longer print times.
Aim for a wall thickness that strikes the right balance between durability and efficiency. Blender allows you to measure and adjust wall thickness with precision, giving you full control over the final outcome.
By following these steps and considering these tips, you’ll be well on your way to successfully 3D printing your Blender creations. Remember, compatibility and preparation are key to achieving outstanding results.
So, fire up Blender, let your creativity run wild, and watch your designs come to life in the tangible world of 3D printing. Happy printing!
Frequently Asked Questions Can Blender be Used for 3D Printing
Can Blender be used for 3D printing?
1. What is Blender?
Blender is a free and open-source 3D creation suite that supports various aspects of 3D modeling, animation, and rendering.
2. Can Blender generate 3D printable models?
Yes, Blender can be used to create 3D printable models by designing and exporting them in a format compatible with 3D printers.
3. What file formats does Blender support for 3D printing?
Blender supports various file formats commonly used for 3D printing, such as STL (Stereolithography), OBJ (Wavefront), and AMF (Additive Manufacturing File Format).
4. Can Blender handle complex geometries for 3D printing?
Yes, Blender is capable of handling complex geometries, making it suitable for creating intricate and detailed 3D models for 3D printing.
5. Does Blender have built-in tools for 3D printing preparation?
No, Blender does not have built-in tools specifically dedicated to 3D printing preparation. However, there are various plugins and add-ons available that can assist in preparing models for 3D printing.
6. Can Blender provide accurate measurements for 3D printed models?
Yes, Blender allows users to define accurate measurements for their models, ensuring precise scaling and sizing for 3D printing.
7. Is Blender suitable for creating functional 3D prints?
Yes, Blender can be used to create functional 3D prints by incorporating mechanical and engineering aspects into the design process.
8. Are there any limitations when using Blender for 3D printing?
Blender’s learning curve can be steep for beginners, and it may require some additional plugins or add-ons for advanced 3D printing preparation features. Additionally, Blender’s interface may not be as intuitive as other software specifically designed for 3D printing.
9. Can Blender be used with any 3D printer?
Yes, Blender can be used with any 3D printer as long as the exported file format is supported by the printer’s software or slicer.
10. Where can I find resources to learn Blender for 3D printing?
There are numerous online tutorials, forums, and communities dedicated to teaching Blender for 3D printing. Websites like Blender Guru, Blender Stack Exchange, and YouTube channels offer valuable resources for beginners and advanced users alike.
Wrapping Up: Can Blender be Used for 3D Printing
So, can a blender be used for 3D printing? The answer is a resounding yes! With the right modifications and settings, a blender can be a powerful tool in the world of 3D printing.
By converting your 3D model into a printable format, you can bring your designs to life using a blender. However, it’s important to note that a blender alone won’t suffice. You’ll need a 3D printer and compatible software to complete the process.
So, if you’re ready to take your creativity to the next level, grab your blender and start printing those amazing 3D creations!

