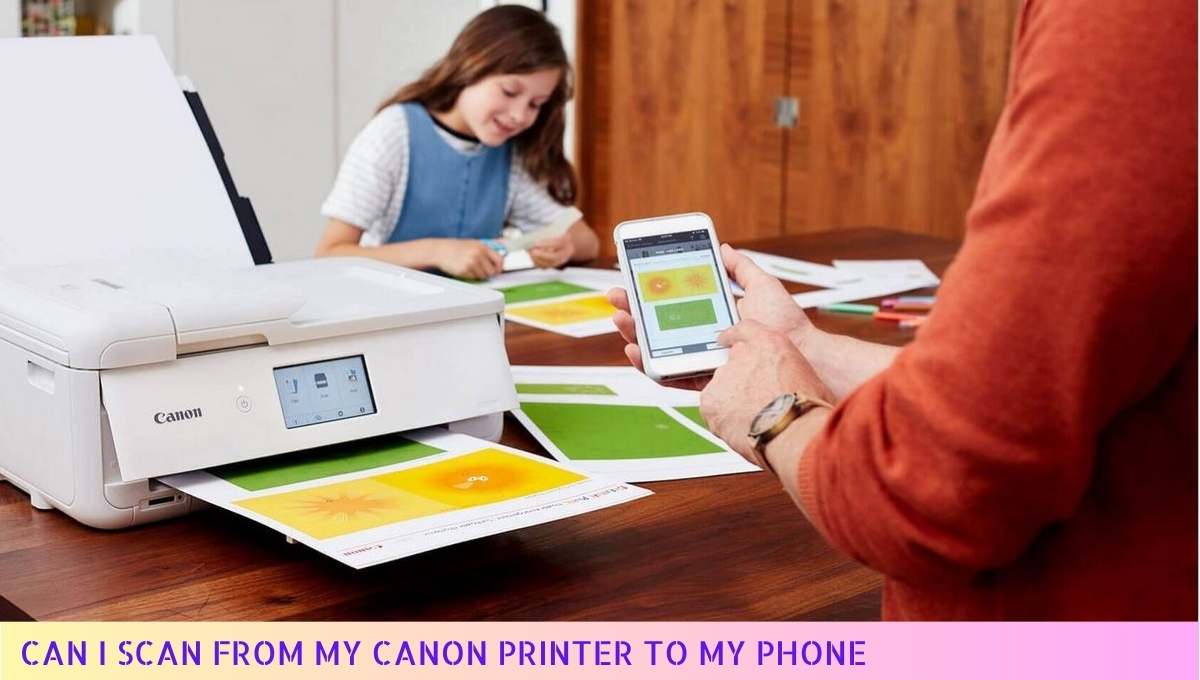
Yes, you can scan from your Canon printer to your phone using the Canon PRINT app.
This app allows you to easily connect your Canon printer to your smartphone via Wi-Fi. Once connected, simply select the scanning option within the app, choose your desired settings, and initiate the scan.
Your scanned documents will be sent directly to your phone, making it a convenient way to manage your files on the go.
Steps to Scan from Canon Printer to Phone
As a user of Canon printers, I understand how convenient it is to scan documents directly to my phone. Here’s a step-by-step guide to help you do the same effortlessly.
Step 1: Prepare Your Canon Printer
Before starting the scanning process, ensure that your Canon printer is ready:
- Power On: Make sure your Canon printer is powered on and properly connected to your Wi-Fi network.
- Check Ink and Paper: Ensure that the printer has sufficient ink and paper to avoid interruptions during scanning.
- Update Firmware: It’s advisable to check for any firmware updates for your printer to ensure optimal performance.
Step 2: Install the Canon App on Your Phone
To scan documents from your Canon printer to your phone, you will need to download the Canon app:
- Choose the Right App: Depending on your printer model, you may need the Canon PRINT Inkjet/SELPHY app or another Canon-specific app.
- Download and Install: Go to the App Store (for iOS) or Google Play Store (for Android) and search for the Canon app. Download and install it on your phone.
- Open the App: Once installed, open the app and follow the prompts to set it up.
Step 3: Connect Your Phone to the Canon Printer
Establishing a connection between your phone and printer is crucial for scanning:
- Wi-Fi Connection: Ensure that your phone is connected to the same Wi-Fi network as your Canon printer.
- Add Printer: In the app, select the option to add a printer. The app should automatically detect your printer if both devices are on the same network.
- Confirm Connection: Follow any prompts to confirm the connection, ensuring that your printer is recognized by the app.
Step 4: Scan the Document
Now that your printer and phone are connected, you can start scanning:
- Place Document: Place the document you want to scan on the printer’s scanner bed. Make sure it is aligned correctly.
- Open the Canon App: In the app, navigate to the scanning feature. This is usually found in the main menu or under a dedicated scanning tab.
- Select Scan Settings: Choose your desired scan settings, such as color, resolution, and file format (JPEG, PDF, etc.).
- Initiate Scan: Tap the scan button in the app to start the scanning process. The printer will scan the document and send it to your phone.
Step 5: Save or Share the Scanned Document
Once the scan is complete, you have several options:
- Preview the Scan: You can preview the scanned document in the app to ensure it meets your expectations.
- Save Document: Save the scanned document to your phone’s storage. You can choose a specific folder for better organization.
- Share Options: The app typically offers sharing options, allowing you to send the document via email, messaging apps, or cloud storage services.
Step 6: Troubleshooting Common Issues
If you encounter any issues during the scanning process, here are some common troubleshooting tips:
- Check Connections: Ensure that both your printer and phone are connected to the same Wi-Fi network.
- Restart Devices: Restarting both your printer and phone can resolve many connectivity issues.
- Reinstall the App: If the app isn’t functioning properly, try uninstalling and reinstalling it.
Final Thoughts
By following these steps, you can easily scan documents from your Canon printer to your phone. This process not only saves time but also enhances productivity, allowing you to access your documents on the go. Happy scanning!
Benefits of Scanning from Canon Printer to Phone
As a tech-savvy individual, I understand the importance of convenience in our daily lives.
Scanning documents from my Canon printer to my phone has transformed the way I manage my paperwork. Here, I’ll share the benefits of this seamless process.
1. Enhanced Accessibility
One of the primary benefits of scanning from my Canon printer to my phone is enhanced accessibility. Once I scan a document, I can access it anytime, anywhere, directly from my mobile device. This convenience is particularly useful when:
- I need to share important documents on the go.
- I want to keep my files organized without cluttering my physical space.
- I’m working remotely and need to reference documents quickly.
2. Efficient Sharing Options
Scanning to my phone allows me to easily share documents with colleagues, friends, or family. I can send files via email, messaging apps, or cloud storage services. This flexibility is invaluable when:
- I have to send a contract for review.
- I want to share a recipe or a document with friends instantly.
- I need to collaborate on a project with team members who are not physically present.
3. Improved Organization
With the ability to scan directly to my phone, I can maintain a more organized digital filing system. I can create folders for different categories, such as:
- Work-related documents
- Personal files
- Receipts and invoices
This organization helps me quickly find what I need without sifting through piles of paper or searching through my email.
4. Cost Savings
Scanning documents instead of printing them can lead to significant cost savings over time. By scanning and storing documents digitally, I reduce the need for:
- Printer ink and paper
- Storage solutions for physical documents
- Mailing costs for sending physical copies
This shift not only saves money but also reduces my environmental footprint, making it a win-win situation.
5. Enhanced Security
When I scan documents to my phone, I can implement various security measures to protect sensitive information. Some of these measures include:
- Using password protection for sensitive files.
- Utilizing encryption for added security.
- Storing files in secure cloud services that offer additional layers of protection.
This level of security provides peace of mind, knowing that my important documents are safe from unauthorized access.
6. Streamlined Workflow
Scanning directly to my phone helps streamline my workflow, especially when I’m juggling multiple tasks. I can quickly scan a document and continue with my work without interruption. This efficiency is particularly beneficial when:
- I’m preparing for meetings and need to gather documents quickly.
- I’m on a tight deadline and need to minimize distractions.
- I want to digitize old files without the hassle of managing physical copies.
7. Compatibility with Various Applications
Many scanning apps available on my phone integrate seamlessly with various productivity tools. This compatibility means I can:
- Directly upload scanned documents to cloud storage platforms.
- Use document management apps to organize my files efficiently.
- Access editing tools to enhance scanned documents before sharing.
This versatility allows me to tailor my scanning process to fit my specific needs and preferences.
8. Easy Editing and Annotation
After scanning a document, I can easily edit or annotate it using my phone. This capability is particularly useful when:
- I need to highlight important sections of a contract.
- I want to add comments or notes to a scanned document.
- I’m collaborating with others and need to provide feedback directly on the document.
Being able to edit and annotate on the go enhances my productivity and keeps my projects moving forward.
9. Time-Saving Convenience
Lastly, scanning from my Canon printer to my phone saves me valuable time. The entire process is quick and efficient, allowing me to:
- Complete tasks faster.
- Reduce the time spent searching for physical documents.
- Minimize delays when sharing important information.
This time-saving aspect is crucial in today’s fast-paced environment, where every minute counts.
Scanning from my Canon printer to my phone has provided me with numerous benefits that enhance my productivity, organization, and overall efficiency.
Embracing this technology has truly transformed the way I manage my documents and workflows.
Troubleshooting Common Issues when Scanning from Canon Printer to Phone
When I first started scanning from my Canon printer to my phone, I encountered a few hiccups along the way. Understanding these common issues can save you time and frustration, ensuring a smoother scanning experience.
1. Connection Problems
One of the most frequent issues I faced was connectivity between my Canon printer and my phone. Here are some steps to troubleshoot:
- Check Wi-Fi Connection: Ensure that both your printer and phone are connected to the same Wi-Fi network. Sometimes, I found that switching my printer off and on could help re-establish the connection.
- Restart Devices: If you’re experiencing connectivity issues, restarting both your printer and phone can often resolve temporary glitches.
- Update Firmware: Ensure that your printer’s firmware is up to date. I regularly check for updates through the Canon website or the printer’s settings menu.
2. Scanning App Issues
If you’re using a specific app to scan, you may run into problems. Here’s how to troubleshoot:
- Check App Compatibility: Make sure the scanning app you’re using is compatible with your Canon printer model. I had to download the Canon PRINT app for my specific model to get it working correctly.
- Reinstall the App: Sometimes, uninstalling and reinstalling the app can clear up bugs. I found that this often resolved any issues I was experiencing.
- Clear Cache: If the app is slow or unresponsive, clearing the cache can help. I usually do this through my phone’s settings.
3. Quality Issues
Scanning quality can sometimes be disappointing. Here’s how to ensure you get the best results:
- Adjust Settings: Check your scanning settings. I often adjust the resolution and color settings in the app to improve the quality of my scans.
- Clean the Scanner Glass: A dirty scanner glass can lead to blurry images. I make it a habit to clean the glass with a soft, lint-free cloth regularly.
- Use the Correct Paper Type: Ensure that you’re using the right type of paper for scanning. I found that using the correct paper significantly improved the clarity of my scans.
4. File Format Issues
Sometimes, the format of the scanned document can be a problem. Here’s how to handle it:
- Check Supported Formats: Ensure that the file format you’re scanning to is supported by your phone. I typically use PDF or JPEG formats, as they are universally compatible.
- Convert Files: If you need a different file format, consider using an online converter or an app. I often use conversion tools that help me change file types without losing quality.
5. App Permissions
Permissions can sometimes prevent the app from functioning correctly. Here’s what to check:
- Check App Permissions: Make sure the scanning app has the necessary permissions to access your camera and storage. I often revisit my phone’s settings to ensure everything is enabled.
- Update Privacy Settings: Sometimes, updates to your phone’s operating system can change privacy settings. I regularly check these settings to ensure my scanning app has full access.
6. Error Messages
Encountering error messages can be frustrating. Here’s how to troubleshoot:
- Read the Error Message: Take a moment to read the error message carefully. It often provides clues about what the issue might be. I’ve found that a quick online search for the specific error code can yield solutions.
- Consult the Manual: If you’re unsure, consulting the printer’s manual can provide insights into specific error codes and their meanings.
- Contact Support: If all else fails, don’t hesitate to reach out to Canon’s customer support for assistance. They can provide expert advice tailored to your issue.
By addressing these common issues, I’ve been able to streamline my scanning process and enjoy the convenience of transferring documents directly to my phone.
With a bit of troubleshooting, you can enhance your scanning experience and avoid unnecessary stress.
Tips for Efficiently Scanning from Canon Printer to Phone
As a frequent scanner, I understand how crucial it is to streamline the scanning process. Here are some effective tips to help you efficiently scan from your Canon printer to your phone.
1. Ensure Your Devices Are Connected
Before you begin scanning, it’s essential to confirm that both your Canon printer and your phone are connected to the same Wi-Fi network. This connection is vital for seamless communication between the two devices. Here’s how to check:
- On your printer, access the network settings and ensure it is connected to your Wi-Fi.
- On your phone, go to the Wi-Fi settings to verify that you are on the same network.
2. Use the Right App
To facilitate scanning, make sure you have the correct application installed on your phone. The Canon PRINT Inkjet/SELPHY app is highly recommended as it provides a user-friendly interface for scanning and managing documents. Here’s how to get started:
- Download the Canon PRINT app from the App Store or Google Play Store.
- Open the app and follow the prompts to connect it to your printer.
3. Optimize Your Scan Settings
Adjusting your scan settings can significantly enhance the quality and efficiency of your scans. Here are some settings to consider:
- Resolution: For documents, a resolution of 300 DPI is usually sufficient. For photos, consider a higher resolution.
- File Format: Choose the right file format based on your needs. PDF is great for documents, while JPEG is suitable for images.
- Color Settings: Decide whether you need color, grayscale, or black and white based on the type of document you are scanning.
4. Position Your Document Properly
The way you place your document on the scanner can affect the quality of the scan. To achieve the best results:
- Align your document with the guides on the scanner bed.
- Make sure the document is flat and free of wrinkles or creases.
- If scanning multiple pages, ensure they are stacked neatly and fed correctly into the scanner.
5. Preview Before Finalizing
Most scanning apps, including the Canon PRINT app, offer a preview option. I highly recommend using this feature:
- Previewing allows you to see how the scan will look before finalizing it.
- You can adjust the cropping and make any necessary changes to ensure the final scan meets your expectations.
6. Save to the Right Location
After scanning, choose the appropriate location to save your document. You can save directly to your phone’s gallery or a cloud service for easy access later:
- If using cloud services, consider options like Google Drive, Dropbox, or iCloud for easy sharing and backup.
- Organize your scanned documents in folders to make them easy to find later.
7. Regular Maintenance of Your Printer
To ensure that your Canon printer operates smoothly, regular maintenance is crucial. Here are a few maintenance tips:
- Keep the scanner glass clean to avoid streaks or marks on your scans.
- Regularly check for firmware updates to ensure optimal performance and access to new features.
- Perform routine checks on the printer to ensure that all components are functioning correctly.
8. Backup Your Scans
After scanning important documents, consider backing them up. This step is vital for protecting your data:
- Use a cloud service for automatic backups of your scanned documents.
- Consider creating physical copies of critical documents for added security.
9. Experiment with Features
Many Canon printers come with advanced scanning features. Take the time to explore these options:
- Document Feeder: Use this feature for scanning multiple pages quickly.
- Double-Sided Scanning: If your printer supports it, this can save time and effort when scanning both sides of a document.
10. Seek Help When Needed
If you encounter any issues while scanning, don’t hesitate to reach out for help. Canon’s customer support and user forums can provide valuable assistance:
- Check the user manual for troubleshooting tips.
- Visit Canon’s official website for FAQs and support resources.
By following these tips, I’m confident you will enhance your scanning experience from your Canon printer to your phone, making it more efficient and effective. Happy scanning!
FAQs on Scanning from Canon Printer to Phone
Wondering if you can scan documents from your Canon printer directly to your phone? This guide provides answers to common questions about the process, ensuring you have the information you need.
Can I scan from my Canon printer to my phone?
Yes, you can scan documents from your Canon printer to your phone using the Canon PRINT app. This app allows you to connect your printer and easily transfer scanned files to your mobile device.
What do I need to scan from my Canon printer to my phone?
To scan from your Canon printer to your phone, you’ll need a compatible Canon printer, the Canon PRINT app installed on your mobile device, and a stable Wi-Fi connection to facilitate communication between the devices.
How do I set up my Canon printer for scanning?
First, ensure your printer is connected to the same Wi-Fi network as your phone. Then, download the Canon PRINT app and follow the on-screen instructions to add your printer. Once set up, you can start scanning.
Can I scan multiple pages at once?
Yes, if your Canon printer supports automatic document feeding (ADF), you can scan multiple pages in one go. The app will guide you through the process, allowing for efficient scanning of multi-page documents.
What file formats can I scan to my phone?
The Canon PRINT app typically allows you to save scanned documents in various formats, including PDF and JPEG. You can choose the format that best suits your needs during the scanning process.
Is the Canon PRINT app free to use?
Yes, the Canon PRINT app is free to download and use. However, standard data charges may apply depending on your mobile data plan when using the app.
Can I edit scanned documents on my phone?
While the Canon PRINT app does not include editing features, you can use third-party apps on your phone to edit scanned documents after transferring them from your printer.
What should I do if my printer won’t connect to the app?
If your printer won’t connect, ensure both devices are on the same Wi-Fi network. Restart your printer and phone, and check for any software updates for the Canon PRINT app. If problems persist, consult the user manual.
Can I scan directly to cloud storage?
Yes, the Canon PRINT app allows you to scan directly to cloud storage services like Google Drive or Dropbox. After scanning, you can select the cloud service to save your document easily.
Is there a limit to the number of pages I can scan?
The limit on the number of pages you can scan may depend on your printer’s capabilities and the app’s settings. However, many Canon printers with ADF can handle a substantial number of pages in one session.
Wrap Up
Scanning documents from my Canon printer to my phone is a seamless process that enhances my productivity.
By utilizing the Canon app, I can easily manage and send scanned files directly to my mobile device, making it incredibly convenient for my on-the-go lifestyle. This feature truly simplifies how I handle important documents.
I encourage you to give this a try if you haven’t already. It’s a game-changer for anyone who needs to digitize paperwork quickly. The ease of access and efficiency it brings can really streamline your daily tasks.
Thank you for taking the time to read this! If you found this information helpful, please share it with friends and revisit our website for more insights. Your support means a lot! 😊

