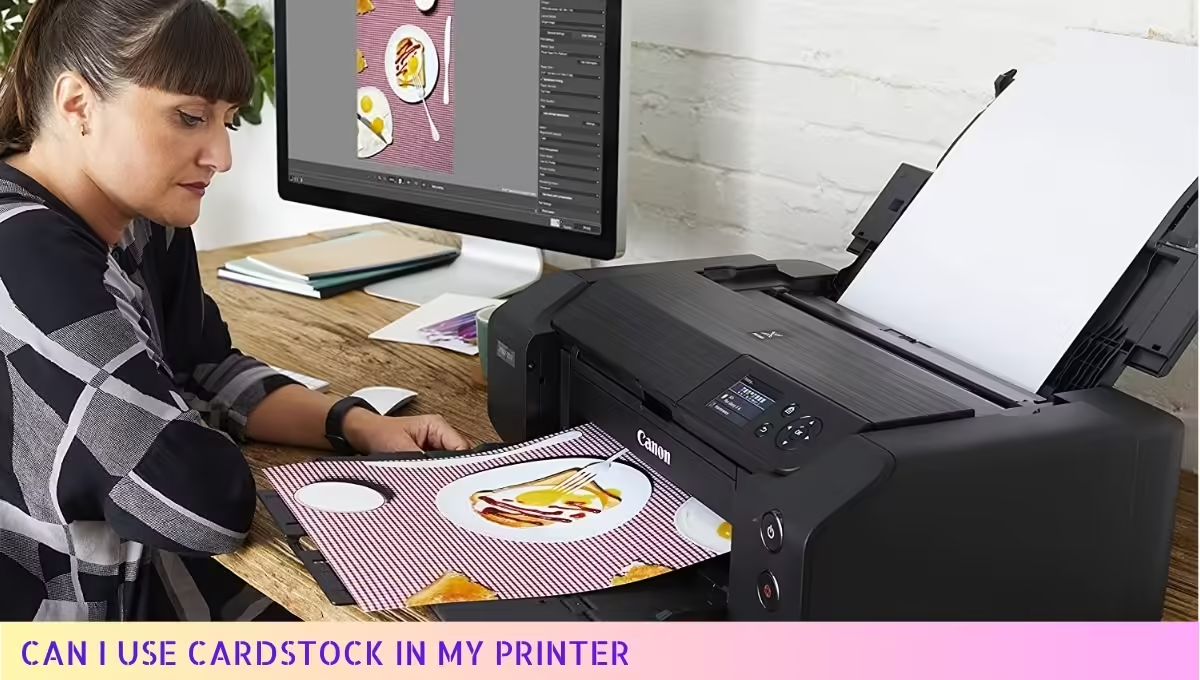
Yes, you can use cardstock in your printer, but ensure it is compatible with your specific model.
Many inkjet and laser printers can handle cardstock, but it’s essential to check your printer’s specifications for maximum paper thickness.
Adjusting the printer settings to accommodate heavier paper will also help achieve the best print quality. Always test a single sheet first to avoid jams and ensure that the print quality meets your expectations.
Benefits of Using Cardstock in Your Printer
When it comes to printing projects, cardstock is a game-changer. I’ve found that using cardstock not only enhances the quality of my prints but also opens up a world of creative possibilities.
Durability and Strength
One of the most significant benefits of using cardstock is its durability. Unlike standard printer paper, cardstock is thicker and more robust, making it ideal for projects that require a strong foundation.
Whether you’re creating invitations, greeting cards, or posters, cardstock can withstand wear and tear better than regular paper.
Professional Appearance
When I print on cardstock, the final product has a professional look that’s hard to achieve with thinner paper. The weight and texture of cardstock give my prints a polished and high-quality feel. This is particularly important when I’m creating materials for business presentations or special events.
Vibrant Color and Detail
Cardstock also offers excellent color saturation, which means that my prints appear more vibrant and detailed. The thicker surface allows for better ink absorption, resulting in sharper images and more vivid colors.
This is especially beneficial when I’m printing graphics or photographs, as the end result is visually striking.
Versatility for Various Projects
Another benefit of cardstock is its versatility. I can use it for a wide range of projects, including:
- Business Cards: Cardstock provides a sturdy base that makes my business cards feel substantial and memorable.
- Crafts: Whether I’m making scrapbooks, greeting cards, or other crafts, cardstock is perfect for adding a personal touch.
- Educational Materials: For my teaching projects, cardstock is ideal for flashcards and visual aids, as it stands up to frequent handling.
- Decorations: I love using cardstock for party decorations, as it can be easily cut and shaped into various designs.
Cost-Effectiveness
While cardstock may be slightly more expensive than standard paper, its durability and professional appearance make it a cost-effective choice in the long run.
I find that the investment pays off, especially for projects where quality matters most.
The ability to create high-quality prints without the need for expensive outsourcing is a significant advantage.
Easy to Handle and Print
Printing on cardstock is relatively straightforward. Most printers can handle cardstock, and the thickness adds stability during the printing process. I often find that my printer manages cardstock without any issues, resulting in clean and crisp prints. Additionally, cardstock is available in various weights, allowing me to choose the perfect thickness for my specific needs.
Eco-Friendly Options
For those of you who are environmentally conscious, there are eco-friendly cardstock options available.
Many brands offer cardstock made from recycled materials or sustainably sourced fibers. By choosing these options, I can produce beautiful prints while also being mindful of my environmental impact.
Enhanced Creativity
Using cardstock has truly enhanced my creativity. The various colors, textures, and finishes available allow me to experiment and try new things.
I can easily find cardstock that complements my project’s theme, whether I’m looking for a matte finish for a sophisticated look or a glossy finish for something more vibrant.
Conclusion
The benefits of using cardstock in your printer are numerous. From its durability and professional appearance to its versatility and cost-effectiveness, cardstock is an excellent choice for anyone looking to elevate their printing projects.
By incorporating cardstock into my printing routine, I’ve been able to achieve stunning results that truly stand out.
Types of Printers Compatible with Cardstock
As a printing enthusiast, I understand the importance of knowing which printers can handle cardstock effectively.
This knowledge ensures you achieve the best results for your projects. Let’s explore the types of printers that work seamlessly with cardstock.
1. Inkjet Printers
Inkjet printers are among the most popular options for printing on cardstock. They offer excellent color reproduction and are capable of producing vibrant images and detailed graphics. Here are some key features that make inkjet printers suitable for cardstock:
- Versatility: Inkjet printers can handle a range of paper types and weights, including cardstock.
- High-Quality Prints: They deliver sharp text and stunning colors, making them ideal for invitations, greeting cards, and art prints.
- Affordability: Inkjet printers come in various price ranges, making them accessible for home and small business users.
However, when using an inkjet printer, ensure that it is designed for heavier media. Some lower-end models may struggle with thick cardstock.
2. Laser Printers
Laser printers are another excellent choice for printing on cardstock. They use toner rather than ink, which can provide a different texture and finish. Here’s what you should know about laser printers:
- Speed: Laser printers are typically faster than inkjet printers, making them suitable for high-volume printing tasks.
- Durability: Prints from laser printers are more resistant to smudging and fading, which is beneficial for projects that require longevity.
- Cost-Effectiveness: While the initial investment might be higher, laser printers often have lower costs per page, especially for black and white prints.
When using a laser printer, it’s important to check the specifications to ensure it can handle the thickness of your cardstock. Some models may have limitations on paper weight.
3. All-in-One Printers
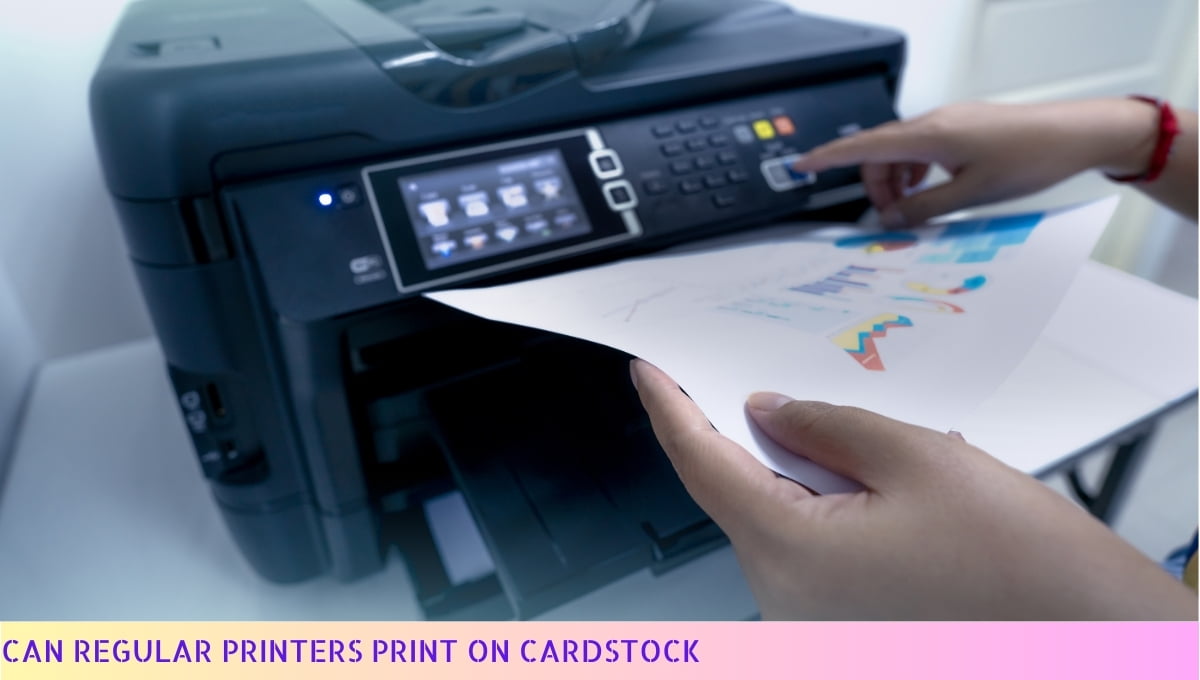
All-in-one printers combine the functionality of printing, scanning, copying, and sometimes faxing.
Many of these models are compatible with cardstock, making them a great choice for home offices or small businesses. Here are some benefits:
- Multi-Functionality: You can print, scan, and copy all from one machine, saving space and money.
- Convenience: Ideal for users who need to produce a variety of documents, including cardstock projects.
- Variety of Media Support: Most all-in-one printers are designed to handle different paper types, including cardstock.
As with other printer types, ensure that your all-in-one printer can accommodate the specific weight and thickness of the cardstock you intend to use.
4. Specialty Printers
For those who are serious about their printing projects, specialty printers such as photo printers or commercial-grade printers may be the best option. These printers are designed to handle a wide variety of media types, including cardstock. Here’s what sets them apart:
- Professional Quality: Specialty printers often produce higher-quality prints with superior color accuracy and detail.
- Wide Format Printing: Some models can print on larger sheets of cardstock, making them ideal for posters and banners.
- Advanced Features: Many come equipped with advanced features like borderless printing and multiple color cartridges for better color mixing.
While these printers can be more expensive, they are a worthwhile investment for anyone looking to produce professional-grade cardstock prints.
5. Compatibility Considerations
When selecting a printer for cardstock, there are a few compatibility considerations to keep in mind:
- Paper Weight: Check the printer’s specifications to see the maximum paper weight it can handle. Most cardstock ranges from 65 lb to 110 lb.
- Paper Size: Ensure that the printer can accommodate the size of cardstock you want to use, especially if you plan on printing larger formats.
- Feeding Mechanism: Some printers have specific feeding mechanisms that work better with thicker paper. Look for printers with a straight paper path or dedicated cardstock tray.
By understanding the types of printers compatible with cardstock, you can make an informed decision that meets your printing needs and ensures high-quality results for your projects. Happy printing!
Tips for Printing on Cardstock
Printing on cardstock can yield stunning results for your projects. To ensure you achieve the best quality, I’ve compiled essential tips to help you navigate the process smoothly.
1. Choose the Right Cardstock
Not all cardstock is created equal. When selecting cardstock for your printing projects, consider the following:
- Weight: Cardstock typically ranges from 65 lb to 110 lb or more. For most home printers, a weight between 80 lb and 100 lb is ideal.
- Finish: Cardstock comes in various finishes such as matte, glossy, and textured. Choose a finish that complements your design.
- Size: Ensure the cardstock size matches your printer’s capabilities. Standard sizes like letter (8.5 x 11 inches) or A4 (8.3 x 11.7 inches) are commonly used.
2. Adjust Printer Settings
Before hitting the print button, it’s crucial to adjust your printer settings to accommodate the cardstock. Here’s how:
- Paper Type: Set your printer to recognize that you are using cardstock. This setting can usually be found in the print dialog box under “Paper Type” or “Media Type.”
- Print Quality: Opt for a higher print quality setting. While this may take longer, it ensures that your designs come out sharp and vibrant.
- Feed Method: Depending on your printer model, you might need to change the feed method. Use the manual feed slot if available, as it can handle thicker materials better.
3. Test Print
Before committing to a full print run, conduct a test print. Here’s why:
- Check Alignment: A test print allows you to ensure that your design is properly aligned on the cardstock.
- Assess Quality: Evaluate the colors and sharpness of the print. This step can help you identify any issues before printing multiple copies.
4. Handle with Care
Cardstock can be sensitive to handling, so be mindful of how you manage it:
- Store Properly: Keep your cardstock flat and in a cool, dry place to prevent warping or bending.
- Minimize Fingerprints: When handling cardstock, hold the edges to avoid leaving fingerprints on the print surface.
5. Allow for Drying Time
After printing, it’s essential to let your cardstock dry properly. Consider these points:
- Drying Time: Depending on the type of ink used, allow sufficient drying time before stacking or handling printed sheets. This helps prevent smudging.
- Test Smudge Resistance: Gently touch a corner of the printed cardstock to ensure the ink has dried before proceeding with further handling.
6. Use the Right Tools for Finishing Touches
If you plan to cut, fold, or embellish your cardstock after printing, use the appropriate tools:
- Cutters: Use a paper cutter for clean, straight edges, or scissors for more intricate designs.
- Bone Folder: For folding, a bone folder will give you crisp, professional-looking folds without cracking the cardstock.
- Adhesives: If you’re assembling projects, select adhesives that work well with cardstock, such as glue sticks or double-sided tape.
7. Clean Your Printer Regularly
To maintain the quality of your prints, it’s vital to keep your printer in good condition:
- Remove Debris: Regularly check for and remove any paper dust or debris that may accumulate inside your printer.
- Check Ink Levels: Ensure you have adequate ink levels before printing on cardstock to avoid streaks or faded prints.
8. Experiment and Have Fun
Finally, don’t hesitate to experiment with different cardstock types, colors, and printing techniques. Your creativity is the limit! Here are some ideas:
- Mix Textures: Try combining smooth and textured cardstock for unique visual effects.
- Layering: Create layered designs for invitations or cards to add depth and interest.
By following these tips, you can achieve beautiful results when printing on cardstock. Whether you’re crafting cards, creating marketing materials, or working on a DIY project, these insights will enhance your printing experience.
Common Mistakes to Avoid When Printing on Cardstock
When it comes to printing on cardstock, I’ve learned that avoiding common pitfalls can make all the difference in achieving professional-quality results. Here, I’ll share some mistakes you should steer clear of to ensure your cardstock printing goes smoothly.
1. Not Adjusting Printer Settings
One of the most frequent mistakes I see is not adjusting the printer settings for cardstock. Here’s what you should do:
- Change Paper Type: Make sure to select the appropriate paper type in your printer settings. Most printers have a specific setting for cardstock.
- Adjust Print Quality: Opt for a higher print quality setting to ensure the colors are vibrant and details are sharp.
- Check for Borderless Printing: If your design requires it, enable borderless printing to avoid unwanted white edges.
2. Ignoring Weight and Thickness
Cardstock comes in various weights and thicknesses, and choosing the wrong one can lead to issues:
- Understand Your Printer’s Limits: Check your printer’s specifications to see the maximum weight and thickness it can handle. Exceeding this can cause jams or damage.
- Select the Right Weight: For standard projects, a weight of 80-110 lb is generally suitable, while heavier cardstock is better for more robust applications.
3. Skipping a Test Print
Before committing to a large print job, I always recommend doing a test print. Here’s why:
- Catch Errors Early: A test print allows you to spot any layout or color issues before using your cardstock.
- Check Printer Settings: Use the test print to confirm that your printer settings are correctly configured for cardstock.
4. Not Using the Right Ink
The type of ink you use can significantly impact the final product. Here’s what to consider:
- Ink Compatibility: Make sure your ink is suitable for cardstock. Dye-based inks are great for vibrant colors, while pigment-based inks offer better durability.
- Check Ink Levels: Low ink levels can lead to faded prints, so ensure you have enough ink before starting your project.
5. Overloading the Printer
Loading too many sheets of cardstock at once can lead to jams and misprints. Here’s how to avoid this:
- Load in Batches: If your printer has a capacity limit, load the cardstock in smaller batches to prevent jams.
- Align Properly: Make sure the cardstock is aligned correctly in the tray to ensure smooth feeding.
6. Not Allowing for Drying Time
After printing, it’s crucial to let the cardstock dry properly. Here’s why:
- Prevent Smudging: Cardstock can take longer to dry than regular paper, especially with heavier ink coverage. Allow sufficient time to avoid smudging.
- Store Carefully: Once printed, store the cardstock flat and away from moisture to maintain print quality.
7. Using the Wrong Type of Adhesive
If you plan to embellish or assemble your printed cardstock, using the right adhesive is essential:
- Choose Wisely: Use adhesives specifically designed for cardstock, such as glue sticks or double-sided tape, to avoid warping.
- Avoid Water-Based Glues: These can cause the cardstock to buckle or warp, ruining your project.
8. Forgetting About the Finish
Finishing touches can enhance the appearance of your printed cardstock:
- Consider Coatings: If your project allows, consider using a clear coating or laminate to protect the print and enhance colors.
- Trimming and Scoring: Use a paper trimmer or scoring tool for clean edges and professional-looking results.
By being mindful of these common mistakes, you can ensure that your cardstock printing experience is as seamless as possible. With the right preparation and attention to detail, you’ll achieve stunning results that reflect your creativity and effort.
FAQs on Using Cardstock in Your Printer
Using cardstock in your printer can be a great way to create professional-looking projects. However, it’s essential to understand compatibility and settings for the best results.
Can I use cardstock in my inkjet printer?
Yes, most inkjet printers can handle cardstock. However, you should check your printer’s specifications to ensure it supports the thickness of the cardstock you plan to use.
What type of cardstock is best for printing?
For optimal results, choose cardstock specifically designed for inkjet or laser printers. Look for weights between 65 lb and 110 lb for a good balance of thickness and print quality.
Do I need to change printer settings for cardstock?
Yes, adjusting your printer settings to accommodate cardstock is crucial. Select the appropriate paper type in the print settings, which may include options like “heavyweight” or “cardstock.”
Will cardstock jam my printer?
Cardstock can jam printers if it’s too thick or if the printer is not designed to handle it. Always ensure the cardstock is within the printer’s specifications and feed it properly.
Can I use double-sided cardstock in my printer?
Yes, you can use double-sided cardstock. However, make sure your printer can handle the thickness and that it prints evenly on both sides.
Is it better to use laser or inkjet printers for cardstock?
Both types of printers can handle cardstock, but laser printers often provide sharper images and quicker drying times. Inkjet printers may offer more vibrant colors, depending on the ink used.
What weight of cardstock can my printer handle?
Most home printers can handle cardstock weights between 65 lb and 110 lb. Check your printer’s manual for specific weight limits to avoid any issues.
Can I print on textured cardstock?
Yes, you can print on textured cardstock. However, ensure your printer is compatible and adjust the settings to accommodate the texture for the best results.
How do I prevent smudging when printing on cardstock?
To prevent smudging, allow the printed cardstock to dry completely before handling it. Using high-quality ink and ensuring the printer settings are correct can also help minimize smudging.
What projects can I create using cardstock in my printer?
You can create various projects such as greeting cards, invitations, scrapbooking materials, and craft projects. Cardstock’s durability and print quality make it ideal for professional-looking results.
Wrap Up
Using cardstock in my printer can truly enhance my creative projects, allowing for vibrant prints and professional-quality results. However, it’s essential to check my printer’s specifications to ensure compatibility.
With the right settings and adjustments, I can achieve remarkable outcomes that elevate my printing experience.
I encourage you to experiment with different cardstock types and weights to find what works best for your needs. Don’t hesitate to share your experiences and tips with others. The more we share, the more we learn from each other!
Thank you for taking the time to read this. If you found this information helpful, please revisit our site for more insights and share it with your friends! Your support means a lot! 😊

